So today in this article, we will see how to interface & measure acceleration & even plot graph of values with the help of an accelerometer ADXL335. So lets get on with our accelerometer Arduino tutorial.
Requirements –
- ADXL335 sensor OR ADXL345 sensor
- Arduino Uno
- 5 Male-Female connectors/jumpers
- A pizza to celebrate 😀
Connections of ADXL335 accelerometer with Arduino –

- VCC – 3.3V
- X-axis – A3
- Y-axis – A2
- X-axis – A1
- GND – GND
Calibration of ADXL335 –
Here comes the most important & critical part of our accelerometer arduino tutorial – Calibration. So for this, you need to upload the default code for accelerometers.
Connect your Arduino board to PC & Open Arduino app. Go to Files —> Examples —> Sensors —> ADXL3xx
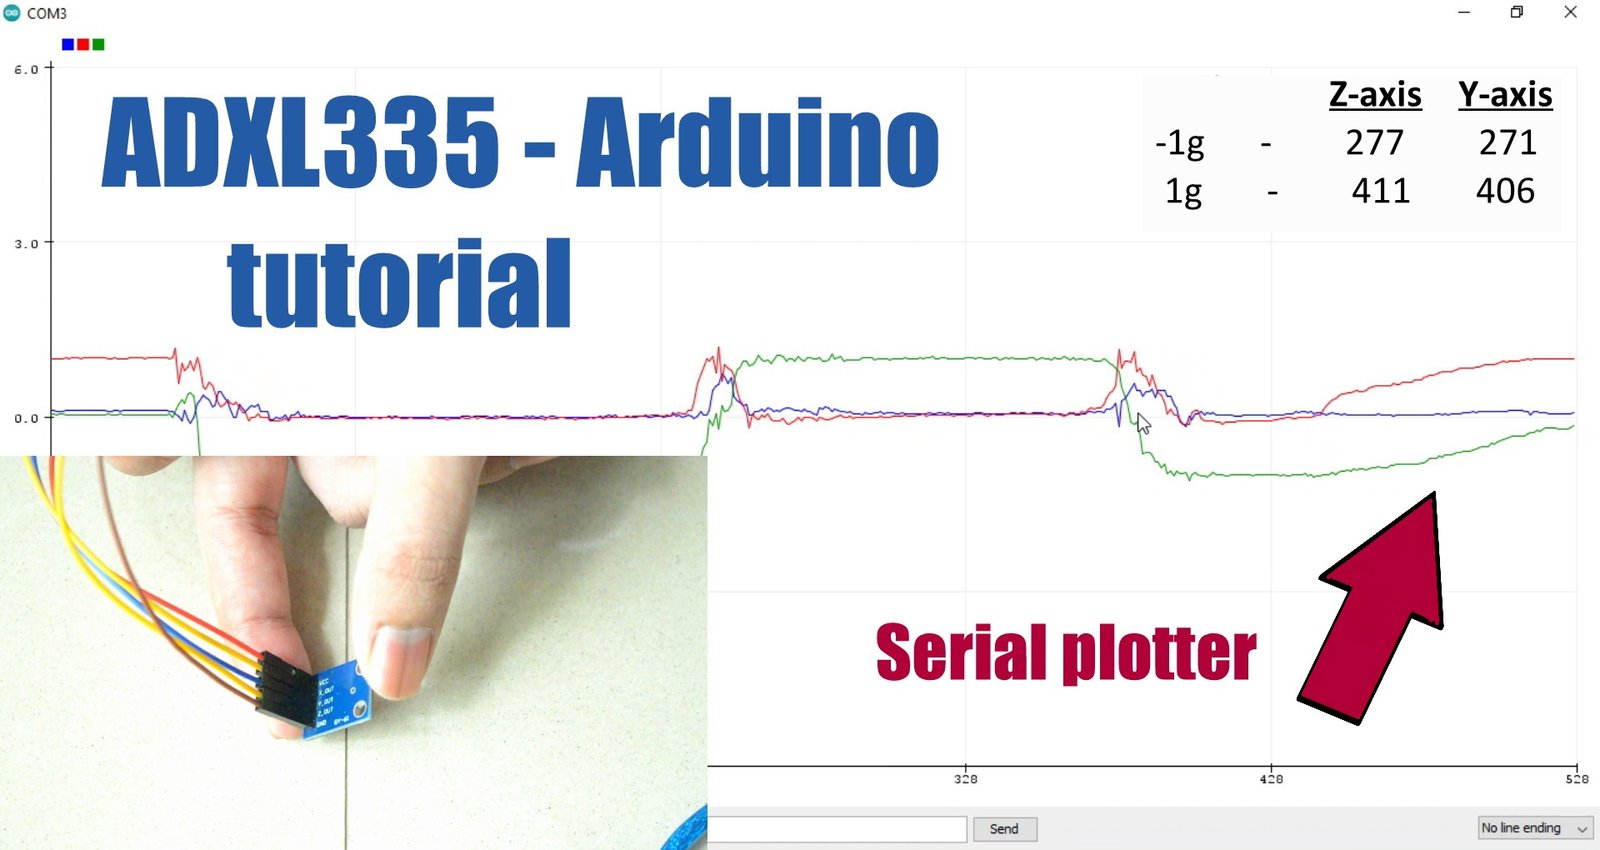
Compile & upload the code. In serial monitor, you will see 3 values from 270 to 410. Hold the sensor stable in each of the directions – X, Y & Z axis & note down the values. We will use these values in our code.
NOTE – Watch the video at the end of the article to understand the calibration process in detail.
Code
 int xpin = A3;
 int ypin = A2;
 int zpin = A1;
 int xvalue;
 int yvalue;
 int zvalue;

void setup()
{
   Serial.begin(9600);          // initialize the serial communications:
}


void loop()
{
  xvalue = analogRead(xpin);                              //reads values from x-pin & measures acceleration in X direction
  int x = map(xvalue, 267, 400, -100, 100);               //maps the extreme ends analog values from -100 to 100 for our understanding
; you need to replace the 267 & 400 value with your values from calibration
  float xg = (float)x/(-100.00);                          //converts the mapped value into acceleration in terms of "g"
  Serial.print(xg);                                       //prints value of acceleration in X direction
  Serial.print("g   ");                                   //prints "g"

  yvalue = analogRead(ypin);
  int y = map(yvalue, 272, 406, -100, 100);
  float yg = (float)y/(-100.00);
  Serial.print("\t");
  Serial.print(yg);
  Serial.print("g   ");

  zvalue = analogRead(zpin);
  int z = map(zvalue, 277, 410, -100, 100);
  float zg = (float)z/(100.00);
  Serial.print("\t");
  Serial.print(zg);
  Serial.println("g   ");
  delay(100);
}
Done.
If you want more clarity or more in depth explanation on code & calibration, here’s a video tutorial –
Plotting graph of acceleration values –
To plot values of the acceleration values received, you need to comment the “Serial.println(“g “);” line & upload the code again.
Now we go to Tools —> Serial Plotter & here we receive our graph!
That’s it. If you face any problems, please comment down below, I will be glad to help you 😀
Related article –
2 comments on “ADXL335 Accelerometer Arduino tutorial with Calibration”
Hi i react for your program how i use when i have 3 motors and i drive motors with aplication from mobil ?
Hello Oliver,
You need to use a bluetooth module if you want to operate a robot for closed ranges