Skip to content
MechStuff

MechStuff

''Making stuff… Simpler''

  • Home
  • MechStuff
  • News
  • How Stuff Works
  • Engines
  • Mech-Tech
  • TechStuff
  • Robotics
    • Robot Stuff
    • Tutorials
  • Engineering Marvels
  • For Mechanical Engineers
    • Games for Mechanical Engineers
    • Movies for Mechanical Engineers
    • Projects for Mechanical engineers
  • Contact Us
  • About us

Tag: Arduino

How to make obstacle avoiding robot using Arduino & Ultrasonic sensor ?

14
September 24, 2017
obstacle avoiding robot using arduino

So you wanna build a robot which never hits anything; you’ve come to the right place! It barely takes 15 minutes to do this! So without wasting our time let’s learn how to make an obstacle avoiding robot!

more “How to make obstacle avoiding robot using Arduino & Ultrasonic sensor ?”

Share this Stuff :

  • Click to share on Facebook (Opens in new window)
  • Click to share on WhatsApp (Opens in new window)
  • Click to share on Reddit (Opens in new window)
  • Click to share on Pinterest (Opens in new window)
  • Click to share on Twitter (Opens in new window)
  • Click to share on LinkedIn (Opens in new window)
  • More
  • Click to email a link to a friend (Opens in new window)
  • Click to print (Opens in new window)
Tutorials Arduino, HC-SR04, L298N, mechatronics, mini-project, motor driver module, obstacle avoiding robot, simplest way, ultrasonic sensor, video tutorial

Control LEDs with Voice Command | Arduino-Bluetooth module tutorial

6
June 15, 2017

At first, I had a notion that it must be such a difficult job – controlling things just by giving voice commands ! Uhh… it seemed that only the experts & nerds could do it ! But believe me, this turned out to be one of the easiest things I’ve come across related to Arduino. So without wasting our time lets know how to control LEDs with voice commands with this Arduino-Bluetooth module tutorial ! more “Control LEDs with Voice Command | Arduino-Bluetooth module tutorial”

Share this Stuff :

  • Click to share on Facebook (Opens in new window)
  • Click to share on WhatsApp (Opens in new window)
  • Click to share on Reddit (Opens in new window)
  • Click to share on Pinterest (Opens in new window)
  • Click to share on Twitter (Opens in new window)
  • Click to share on LinkedIn (Opens in new window)
  • More
  • Click to email a link to a friend (Opens in new window)
  • Click to print (Opens in new window)
Robotics, Tutorials android, Arduino, beginner, blutooth, code, commands, common anode, common cathode, connections, diy, hc-05, mini-project, pdf, philips hue, program, recognition, RGB, video tutorial, voice

Control LEDs with your Android | Arduino-Bluetooth module tutorial

28
January 27, 2017
Control led or any other stuff with android

You already know what we are gonna do today…so lets get started !

Things you’ll need :-

  • Arduino board
  • Breadboard
  • Bluetooth module/sensor – HC05
  • Couple of jumpers/single stranded wires
  • LEDs
  • An ANDROID(obviously 😛 )

more “Control LEDs with your Android | Arduino-Bluetooth module tutorial”

Share this Stuff :

  • Click to share on Facebook (Opens in new window)
  • Click to share on WhatsApp (Opens in new window)
  • Click to share on Reddit (Opens in new window)
  • Click to share on Pinterest (Opens in new window)
  • Click to share on Twitter (Opens in new window)
  • Click to share on LinkedIn (Opens in new window)
  • More
  • Click to email a link to a friend (Opens in new window)
  • Click to print (Opens in new window)
Tutorials android, Arduino, bluetooth module, code, connections, diy, how to, philips hue, program, sensor, smartphone, testing

How to control LEDs with TV remote – Arduino

1
August 23, 2016
Control LED with IR remote

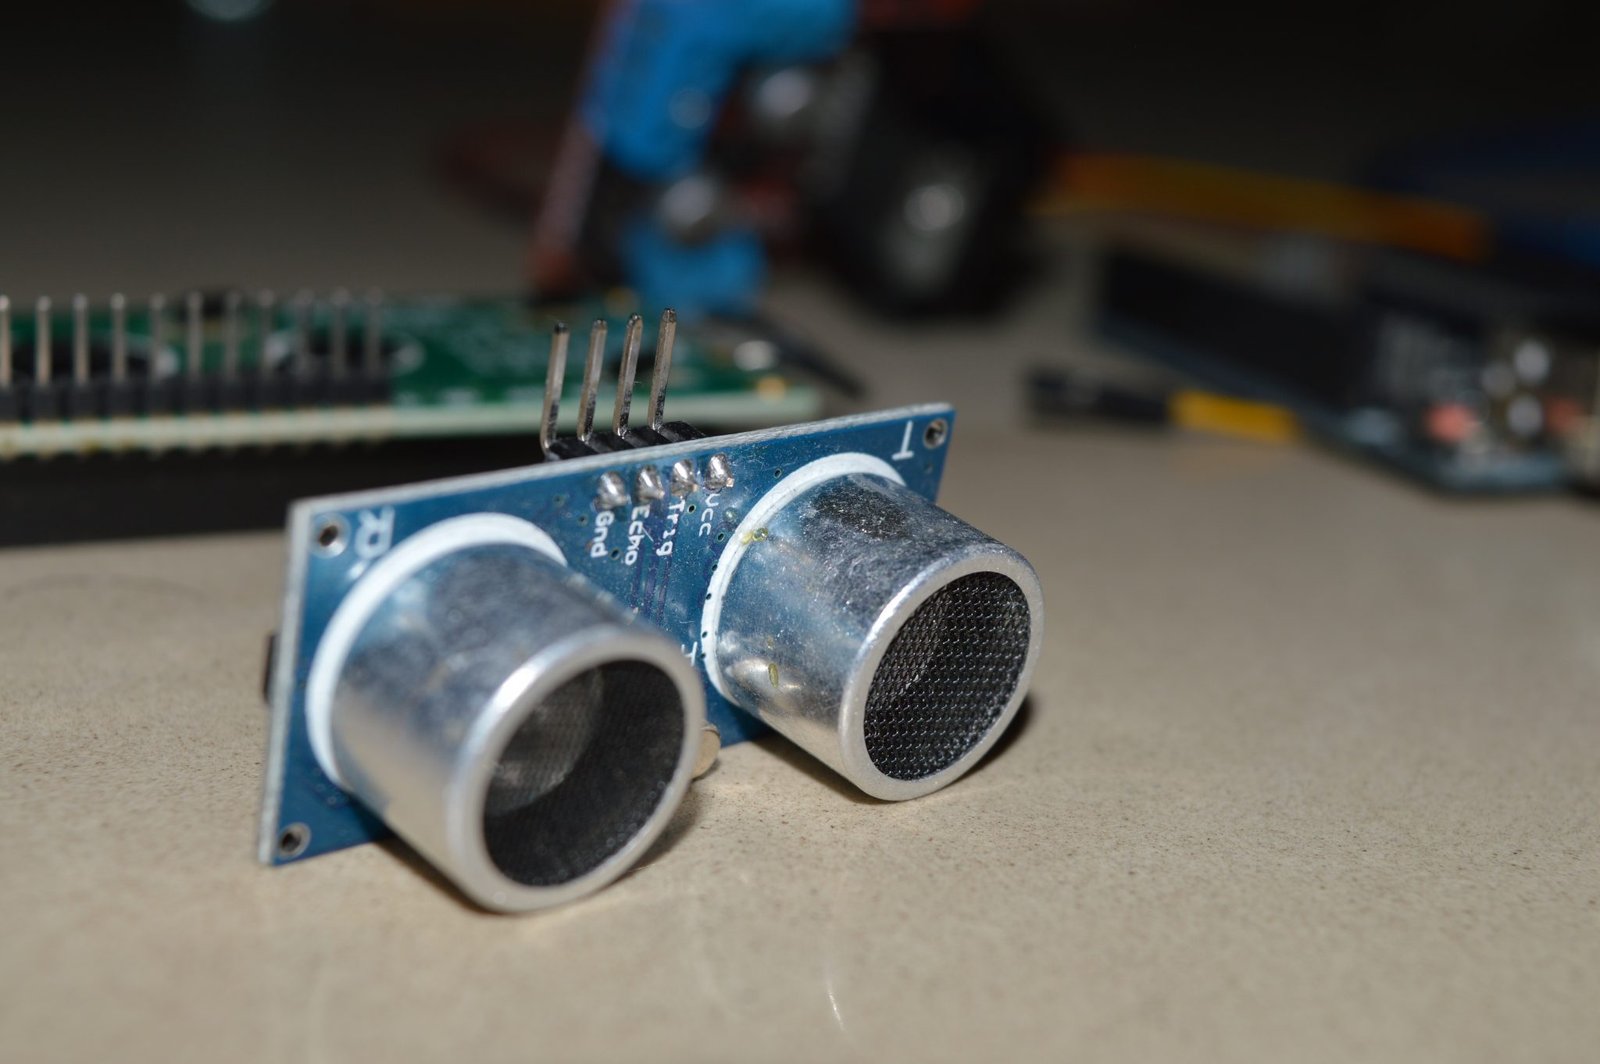
Today I’m going to show you how to control any device with an Infrared remote(TV,DVD,AC etc.) and with the help of Arduino board. So lets get started.

Things you’ll need :-

  • Infrared receiver (I’m using one from the TSOP 17** series)
  • Arduino board.
  • Breadboard.
  • Couple of jumpers/single stranded wires.
  • A LED Any remote(AC, TV, DVD player).

Connections :-

Connections of Infrared receiver with Arduino

Of Infrared reciever-
Pin 1 –                           GND (Ground pin of Arduino).
Pin 2/Middle pin –     VCC (5v supply of Arduino).
Pin 3 –                           Data pin (pin number 3 on Arduino).

Note :- The pin no. 3 is a bit separated from the other two ! Don’t misunderstand between pin1 & pin3 !

Procedure :-

  1. First things first, make the connections.
  2. Now to turn ON/OFF any LED with the help of any remote we must know the value/code of the button through which we are going to change the state !
  3. Download the IRemote library online from this link. Copy & paste the code I’ve provided. Upload it.
  4. After uploading, click on the Serial Moniter option in the top right corner of Arduino window.
    Press the buttons you wish to control your LED with. Note down the values which appear in the Serial monitor window.
  5. Making changes in your code by replacing YOUR values with “YOUR VALUE 1” & “YOUR VALUE 2” in the code.
    Again upload the code & test it out !

Code :-

#include <IRremote.h>
 
int RECV_PIN = 3;               //declared for receiving pulses
int c=0;                        // declared if you want to control with a single button
IRrecv irrecv(RECV_PIN);
decode_results results;


void setup()
{
   pinMode(9, OUTPUT);
   Serial.begin(9600);
  irrecv.enableIRIn();                      // Start the receiver
}

void loop() {
  if (irrecv.decode(&results)) {
    Serial.println(results.value);
    irrecv.resume();                        // Receive the next value
  if(results.value==YOUR VALUE1)                                       
  {
             digitalWrite(9,HIGH);
  }
  else if(results.value==YOUR VALUE2)
  {
             digitalWrite(9,LOW);
  }
                                }
}


/* if((results.value== YOUR VALUE3)&&(c%2==1))                    // enables you to turn on & off with the help of same button"                  
  {
                digitalWrite(9,HIGH);
  }
  else if((results.value==YOUR VALUE3)&&(c%2==0))
  {
                digitalWrite(9,LOW);
  }
  c++;
 }}*/

Here’s a video tutorial which will definitely make things easier for you 😉

Please comment below if you face any difficulties. I’d love to solve them 🙂 .

Share this Stuff :

  • Click to share on Facebook (Opens in new window)
  • Click to share on WhatsApp (Opens in new window)
  • Click to share on Reddit (Opens in new window)
  • Click to share on Pinterest (Opens in new window)
  • Click to share on Twitter (Opens in new window)
  • Click to share on LinkedIn (Opens in new window)
  • More
  • Click to email a link to a friend (Opens in new window)
  • Click to print (Opens in new window)
Tutorials Arduino, control, infrared, led, receiver, remote

Connection, Interfacing & Programming of Ultrasonic Sensor HC-SR04

16
February 13, 2016

Today I will give you a tutorial on the Ultrasonic sensor HC-SR04 ! Also called as PING sensor or RANGE sensor; it is one of the most basic & easiest sensors of the beginners kit ! more “Connection, Interfacing & Programming of Ultrasonic Sensor HC-SR04”

Share this Stuff :

  • Click to share on Facebook (Opens in new window)
  • Click to share on WhatsApp (Opens in new window)
  • Click to share on Reddit (Opens in new window)
  • Click to share on Pinterest (Opens in new window)
  • Click to share on Twitter (Opens in new window)
  • Click to share on LinkedIn (Opens in new window)
  • More
  • Click to email a link to a friend (Opens in new window)
  • Click to print (Opens in new window)
Tutorials Arduino, coding, connections, mini-project, ping sensor, program, range sensor, ultrasonic sensor, video tutorial

Banana Arduino !

July 16, 2015

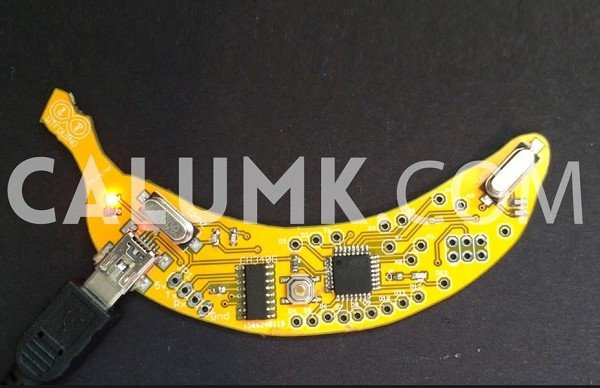
We all love CURVES, ahem-ahem… yea okay, lets just focus here, I am saying in terms of design. Well, now have seen thousands of circuit boards have the same geometrical shapes – square & the rectangle ones.

So here comes the oddly banana shaped Arduino.

It’s maker says that it will not be an open source.

I am sure that the MINIONS will like it 😛 !!!

for more information, visit http://wtfduino.co.uk/

Share this Stuff :

  • Click to share on Facebook (Opens in new window)
  • Click to share on WhatsApp (Opens in new window)
  • Click to share on Reddit (Opens in new window)
  • Click to share on Pinterest (Opens in new window)
  • Click to share on Twitter (Opens in new window)
  • Click to share on LinkedIn (Opens in new window)
  • More
  • Click to email a link to a friend (Opens in new window)
  • Click to print (Opens in new window)
Robotics, RobotStuff Arduino


Like us on Facebook

Like us on Facebook

About MechStuff :-

MECHANISMS keep me ALIVE !
MechStuff is a blog for people who have passion for learning mechanics, mechanical principles, mechanisms & science behind machines/vehicles. In other words, it is for them who get an adrenaline rush when they hear the sounds of super sport cars, jet engines, locomotives & what not !!! :D

Categories

Don’t miss the Top posts

  • How does a Wankel engine work ?
    How does a Wankel engine work ?
  • How do hydrofoils work? | Advantages & Disadvantages
    How do hydrofoils work? | Advantages & Disadvantages
  • What are Couplings? | Types of Couplings and their application
    What are Couplings? | Types of Couplings and their application
  • How to import airfoil coordinates from Excel to CATIA?
    How to import airfoil coordinates from Excel to CATIA?
  • How to make obstacle avoiding robot using Arduino & Ultrasonic sensor ?
    How to make obstacle avoiding robot using Arduino & Ultrasonic sensor ?

Archives

Idealist by NewMediaThemes